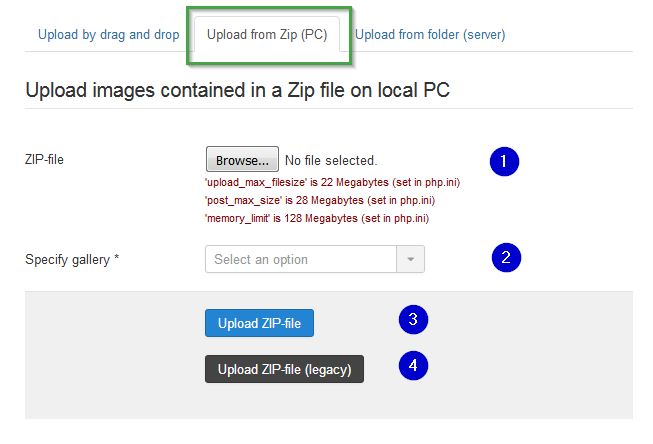
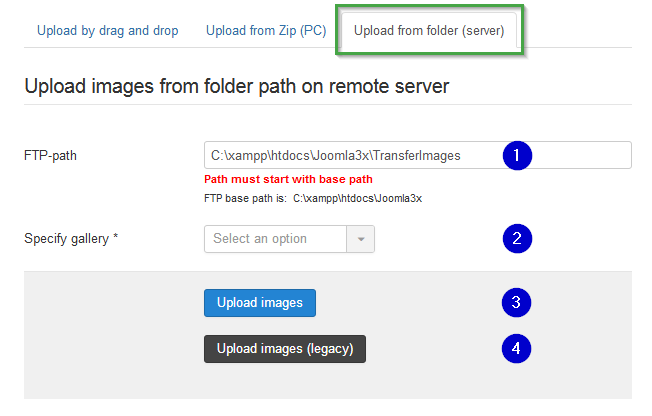
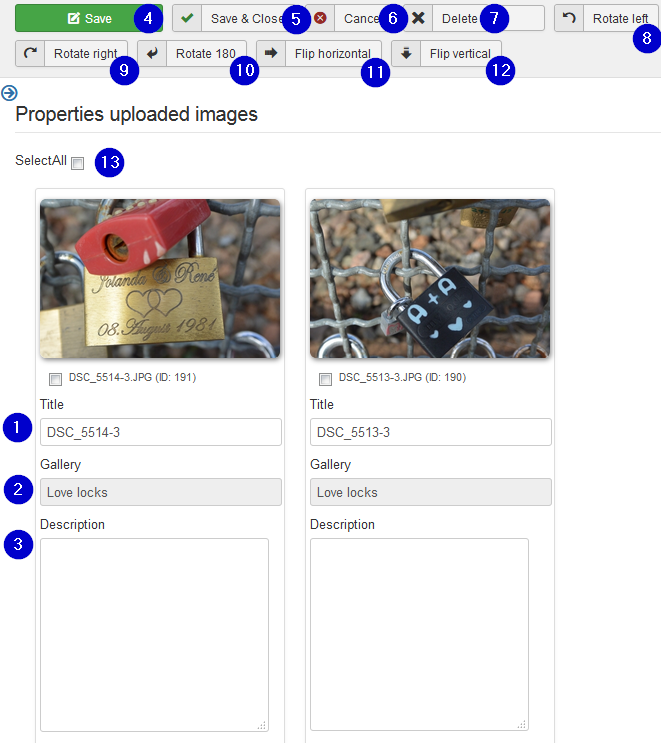
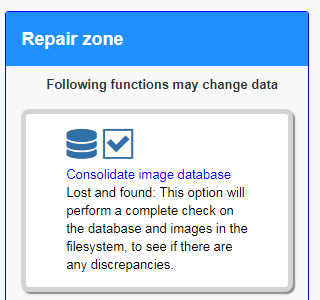
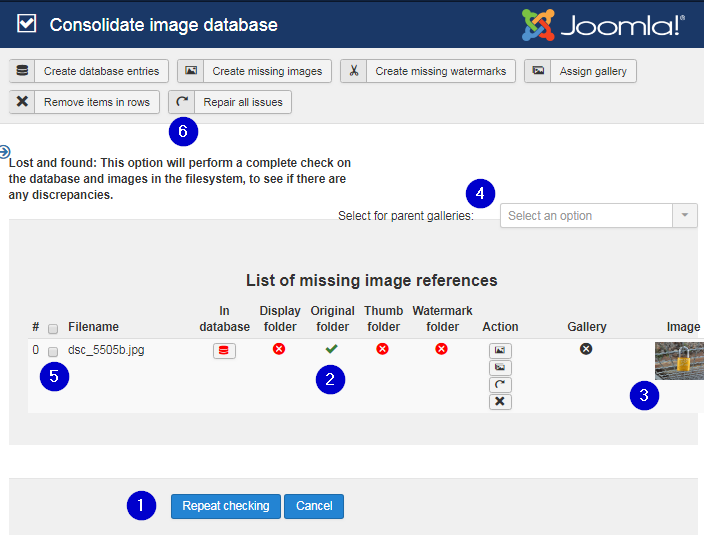
[ ] ToDo: fill out see: RSGallery2_Project\Documentation\J!3x\Upload\upload.md Manches ist ähnlich, manches muss verändert werden There are three tabs to choose On "Upload by drag and drop" a form opens where the properties of a image to be uploaded can be edited. This includes the origin of the image as properties like name, assigned gallery and more. More images can be added in that form. (1) Specify gallery First select an existing gallery This will enable drag and drop ands display the drop area in green (2) Drag and drop area The drag and drop area is marked with a red or green dotted border. The color changes to green when a gallery is selected. An error message appears when a image is dropped while the border is red. (3) Select files This is an other way to select multiple images form a folder on the PC- Press this button and you can move to the image folder and select several images to be downloaded. On exit these files are downloaded This is especially helpful if your operation system remembers the last selected folder and displays it again for the image upload (4) Add image properties After the dropped images appear (are shown) in their area here is provided a batch handling to assign the properties "title" and "description" More below on description of the "Properties uploaded images" view Tip: This functionality can also be reached from the image list view. Select the images to be handled and use button batch and the select "Images Properties" button (5) Upload single images (Legacy) This button leads to the old "legacy" version of single image upload. (6) Upload file size On the bottom is shown the setting of some php variables from the system (from php.ini file) related to the upload process. Even if the file itself complies with all limits the upload itself may fail. (1) Drag and drop area (filled) After a gallery is selected the dotted border is green. Dropped images do appear in this area after the transfer process is completed. (2) Process bars For each dropped file a progress bar appears. It is red as long as the file is not completely transferred. In each state it tells the amount of transferred parts of the file. Attention: Even if the green bar is at 100% telling that the file is completely transferred the server needs time to create the dependent rsgallery2 images and the process is not finished until the matching image is displayed in the drag and drop area (3) Add image properties A click on button "Add image properties" will lead to a page where properties can be assigned to all shown images at once (batch). The title and the description properties can be edited there. This is similar to the second page on upload in previous rsgallery2 versions. It is not necessary to use this view when no title or description editing needed. Info: On creation of the image data on the server side the title is preset from the image name automatically. A zip file containing several images can be uploaded to the server, unzipped and the images assigned to a gallery. (1) Select the zip file on local pc folder Attention: The size of all files within the zip file has to be smaller than the server settings (php.ini) upload_max_filesize and post_max_size. These values are displayed in red below this input. (2) Specify gallery The list on the right contains all gallery names. The top most gallery is the last one created. (3) Upload Zip file Does upload the zip file to the server, unzip the images and jumps to properties "uploaded images view". There the images are displayed and the properties can be assigned. See section "Properties uploaded Files" view below ToDo: Link (4) Upload Zip file (legacy) This button leads to the old "legacy" version of zip file upload. Images can be uploaded to a folder (Shall be created) within the Joomla! installation. The images will be copied from this folder and will be assigned to the gallery (1) FTP Path Defines the path where RSGallery2 will look for images to "upload" The path may be any otherwise empty folder which is accessible (has rights) from within the Joomla! installation. Recommended is a folder TransferImages in images The path must start with the base path to Joomla! installation. To make things easier the standard path is given in small font below the input. In configuration the standard path can be set so it will be automatically filled in. (2) Specify gallery The list on the right contains all gallery names. The top most gallery is the last one created (3) Upload images Does copy the files from given folder on the server and jumps to "Images batch upload" view. There the images are displayed and the properties can be assigned. See form "Images batch upload" view below ToDo: link (4) Upload Zip file (legacy) This button leads to the old "legacy" version of zip file upload. This form enables to set the properties title and description for a batch of images at the same time. (1) Title The title is preset on creation. It may be edited here. The title may be different to the uploaded image name when the name already existed. Then the next free number is appended. (2) Gallery The gallery name can't be changed in this part (3) Description The description may be changed with the standard editor like in the edit single image form. (4) Save Save changes and continue edit on the same images (5) Save & Close Save changes and leave the form to the image list (6) Cancel Ignore the changes and leave the form (7) Delete All or some image can be selected for deleting. (See (8) and (9)) Clicking on the delete button will delete the selected images from the RSGallery2 database and the created image files (8) Rotate left Rotates selected images 90 degrees against the clock (9) Rotate right Rotates selected images 90 degrees with the clock (10) Rotate 180 Rotates selected images 180 degrees. (11) Flip horizontal Flips the selected images horizontal. The bits move from left to right. The bottom of the image keeps being the bottom (12) Flip vertical Flips the selected images vertical. The bits move from bottom to top. The left/right side of the image keeps being the left/right side (13) Select all All images will get a set hook in the box below the image (See also (14)) This can be used to delete, rotate or flip selected images. (14) Select image The image will get a set hook in the box below the image This can be used to delete, rotate or flip selected images. In the images list view images can be selected for batch processing. The following image shows the possible selections which appear after clicking the batch button (1) Add properties This button leads to the properties form (See above) and will open the selected images. So the title and description can be changed for a batch of images In cases where the the upload got stuck you may see a error message and the result looks like below .... In most cases the image data is reserved in the database but the image is not uploaded. Then you may upload the image by FTP to the rsgallery2 "original" destination folder and start the creation of the display and thumb images manual by using a maintenance function In "control panel" select Maintenance There select in section "Repair zone" the button "Consolidate image database". This will lead to a page where it is checked whether there are database entries for missing images or for images with no database / gallery connection The original images are kept in folder in .../Joomla/images/rsgallery/original. Copy your file into this folder. (1) Use button "Repeat checking" so the image is found (2018.07.03) .... The images are kept in following folders in .../Joomla/images/rsgallery/sub_folderUpload
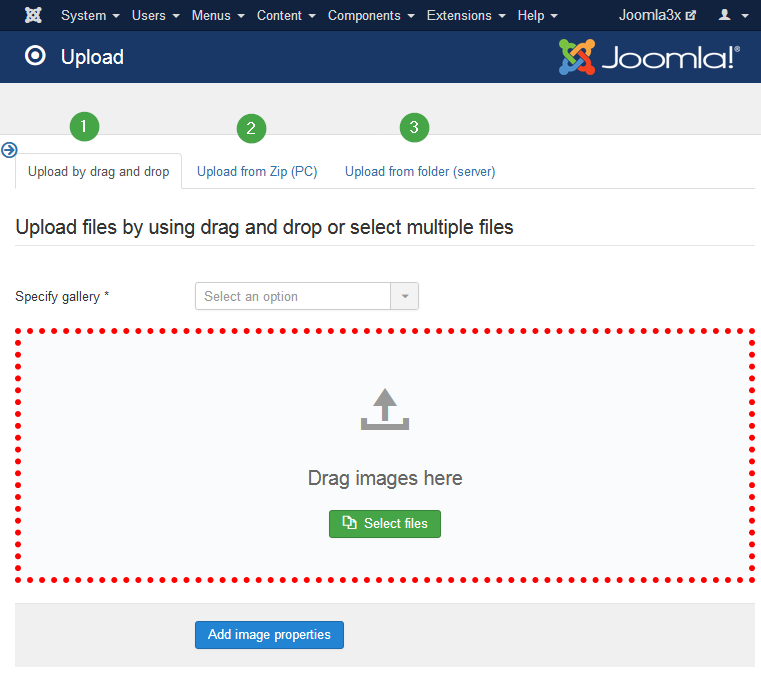
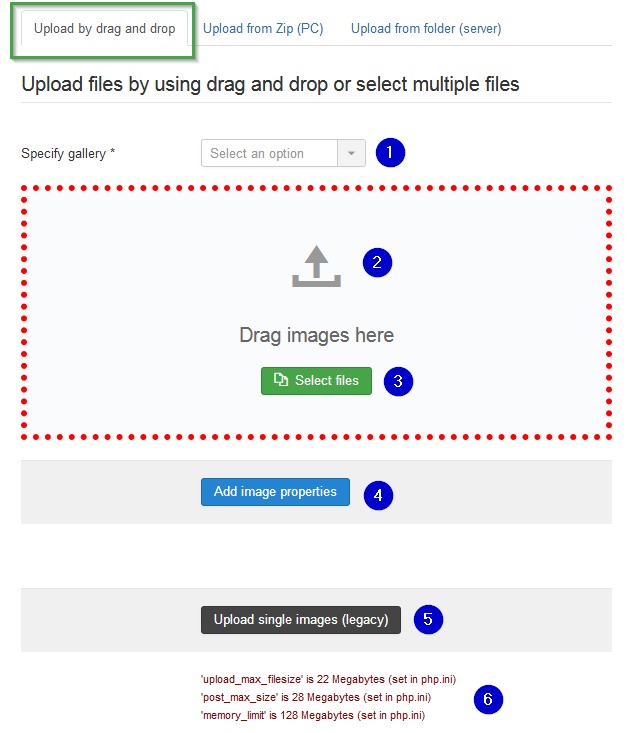
Upload by drag and drop
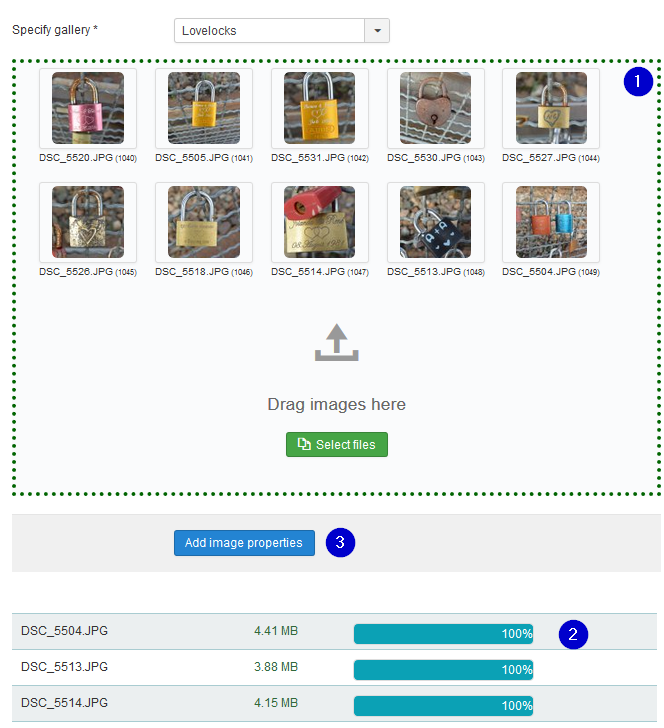
When images are dropped then they are transferred to the server and assigned to the gallery. The display-, thumb- and watermarked images are created and on success the image is displayed in the drag and drop area.
Ass soon as the image is displayed it is secure to assume that the image is stored in the database and assigned to the gallery
When the drag and drop function has enough experience and no user complains then drag and drop is faster and this function will be removedRestrictions
Upload files using drag and drop: View after some uploads
Upload from Zip file (PC)
When the new function has enough experience and no user complains then this function will be removed.Upload from folder (server)
When the new function has enough experience and no user complains then this function will be removed.Properties uploaded Files
It is normally reached over the upload form. It can also be reached with selected images over the batch button in the images list form
Sadly this leads to a very high edit block which creates a ugly layout.Images: Batch process to add properties

How to fix ajax upload errors
1. Check the database reservation / images existence
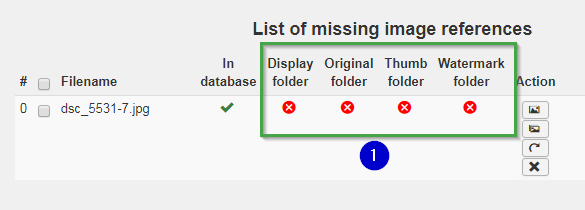
2. Upload image
(2) If the image exists it is marked here
(3) Select the line with clicking on marker in front
(4) Use button "Create missing images".
If all goes well then the line of this image will disappear in the next display of the pageGeneral folders of RSGallery2 images